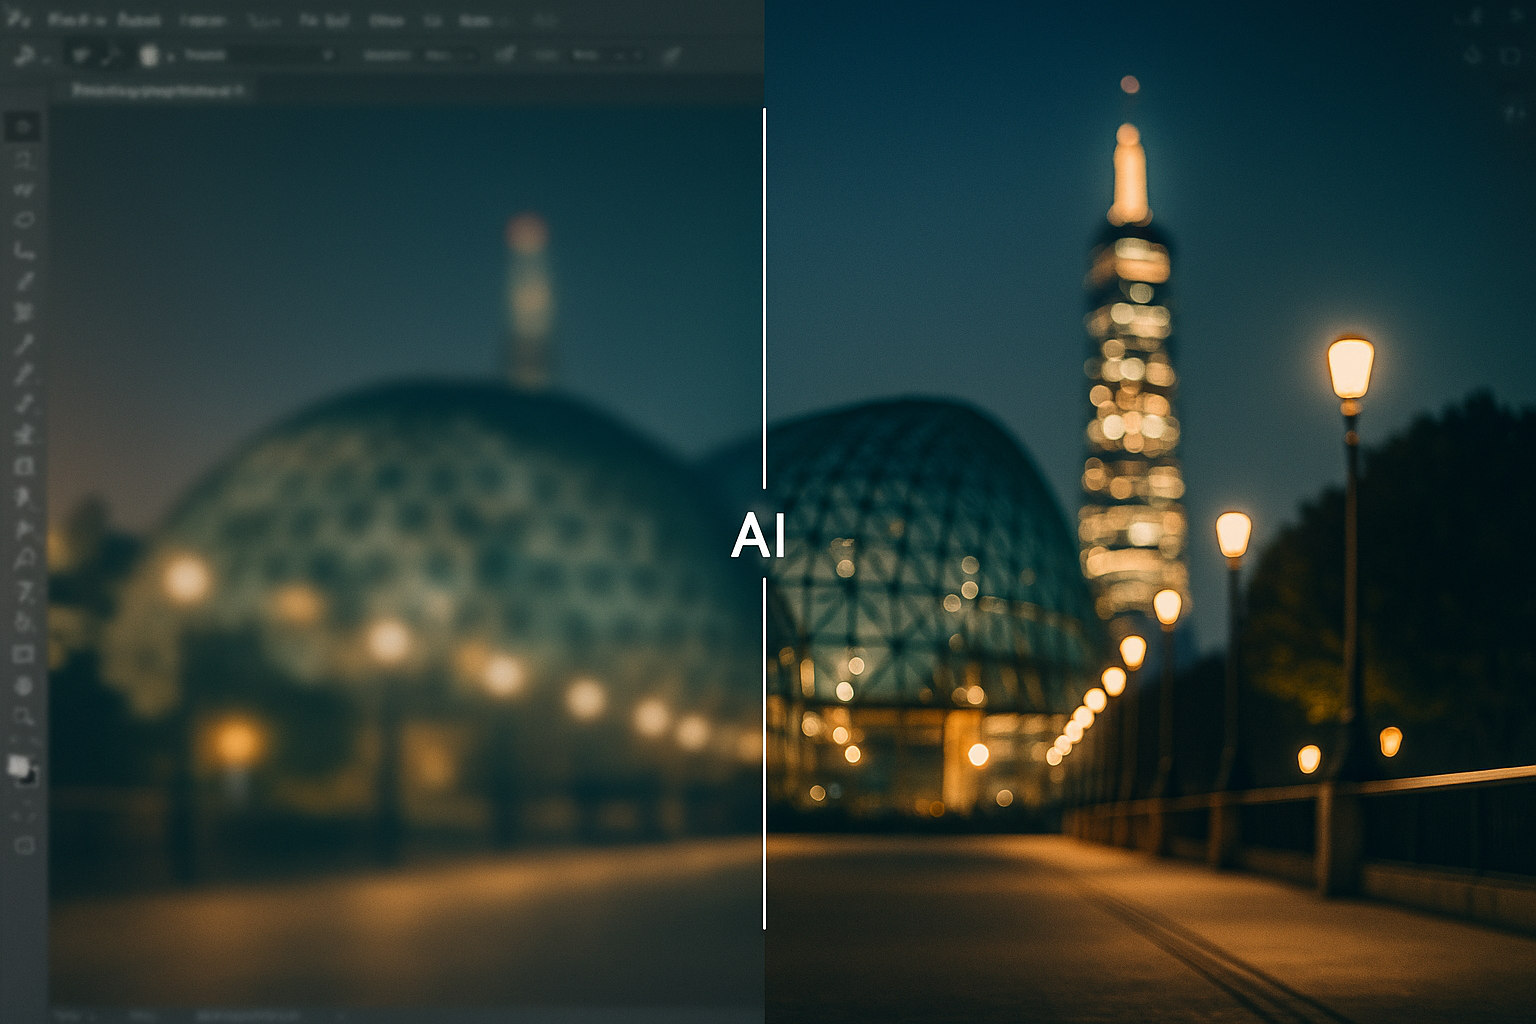
If you open Photoshop every time a shot is soft, you’re spending precious minutes on sliders that an AI sharpen image workflow can resolve automatically. Imgsharer focuses on edge-aware corrections in the cloud, so you preview crisper files while Photoshop stays free for color and compositing.
AI Sharpen Image vs Photoshop: Speed That Matches Deadlines
Photoshop’s Unsharp Mask and Smart Sharpen are powerful, but each layer mask, radius tweak, and halo check adds friction when you just need an AI sharpen image pass. This pipeline detects blur direction, preserves skin tone, and limits halos without you touching radius math.
- Edge intelligence: AI sharpening models understand motion streaks, fine hair, and product edges before applying contrast.
- Noise handling: Grain-aware sharpening boosts clarity without gritty shadows.
- Version history: Keep multiple previews without duplicating PSD layers.
What the AI sharpen image model evaluates
It segments subjects, isolates edges down to pixel clusters, and applies adaptive deconvolution. That’s why you get crisp eyelashes and chrome without the ringing that manual “Amount 150%” moves can create.
Seeing AI handle the heavy lifting first reframes how to sharpen an image in Photoshop: you move from guessing radius values to making tiny, intentional refinements.
When Photoshop still wins: detailed dodge-and-burn, split-toning, or compositing still belong in Adobe’s toolkit. The trick is letting the AI pass clear the blur first so each how to sharpen an image in Photoshop step becomes micro instead of marathon.
When to Use AI Sharpen Image Tools Before Photoshop
Creators lean on this workflow when deadlines dominate and natural texture matters. The AI sharpen image pipeline shines in portraits, handheld product shots, livestream stills, and reels thumbnails.
Creator-ready triggers
- You need to rescue motion-blurred portraits or low-light reels covers instantly.
- You handle ecommerce detail shots and want consistency without cloning layer stacks.
- You want previews that look natural but crisp before handing files to clients.
Need more inspiration? Dive into AI image sharpening for creatives to see how illustrators prep files for gallery prints.
How to Sharpen an Image in Photoshop (Step-by-Step Reality Check)
Still need Photoshop? Here’s how to sharpen an image in Photoshop without wrecking texture, plus why it’s slower than a single AI upload.
- Open your image and duplicate the layer for a non-destructive stack.
- Navigate to Filter → Sharpen → Smart Sharpen.
- Start with Amount 120%, Radius 1.5 px, Reduce Noise 20%.
- Check halos at 100% zoom, then mask back clothing or skin that looks crunchy.
- Export and compare to the AI sharpen image preview for sanity.
How to sharpen an image in Photoshop without artifacts: blend modes and luminosity masks help, but they take time. That’s why many editors let Imgsharer nail the base clarity, then use Photoshop only for selective micro-contrast.
Blend AI Sharpening and Photoshop for Gallery-Ready Results
A hybrid approach wins: run Imgsharer to restore clarity, then open Photoshop for styling. Users report saving up to 70% of their how to sharpen an image in Photoshop workload because the AI already tuned edges and protected tones.
Treat how to sharpen an image in Photoshop as the finishing move—color grading, texture nudging, or artistic flourishes—after AI sharpening gets the file client-ready, so your AI sharpen image step stays consistent.
FAQ: Should you still sharpen in Photoshop?
Yes—when you need artistic control, texture painting, or localized retouching. But letting an AI sharpen image engine like Imgsharer do the first pass means every PSD tweak starts from a clean, crisp foundation.
You don’t have to ditch Adobe, just stop wasting time on basic clarity. Let the AI sharpen image workflow lift the blur, then finish your look in layers. Try Imgsharer free →